Kubernetes Deployment is a declarative controller object that manages the lifecycle of containerized application replicas across a cluster, handling rollout, scaling, and self-healing without manual intervention. See also: webhook.
Docker gets a containerized application running on one machine. The problem starts when that machine crashes, traffic spikes past a single instance's capacity, or an update needs to roll out without taking the service offline. Docker alone has no native answer to any of those three situations. Kubernetes addresses all of them through a structured layer of container orchestration that treats your application's desired state as a declaration, not a manual checklist. This guide walks through the local setup, YAML manifest authoring, deployment lifecycle commands, failure diagnosis, and the decision point between staying with Docker and graduating to Kubernetes.
What Kubernetes Does and Why Docker Alone Is Not Enough
![Video thumbnail shows Kubernetes Tutorial for Beginners [FULL COURSE in 4 Hours]](https://i.ytimg.com/vi/X48VuDVv0do/hqdefault.jpg)
Kubernetes Deployment tracks the desired state of a containerized application and continuously reconciles actual cluster state to match it. Docker, without an orchestrator, offers no automatic restart after a process crash, no mechanism to maintain N simultaneous replicas across hosts, and no native rolling update coordination. Those gaps are not edge cases; they are daily operational realities for any application beyond a single developer's laptop. Container orchestration fills each gap: Kubernetes detects a failed pod and schedules a replacement, distributes replicas across healthy nodes, and executes updates one pod at a time to preserve availability.
Kubernetes splits its workload between two planes. The control plane consists of the API server (the HTTP front end for all cluster operations), etcd (a distributed key-value store that holds cluster state), the scheduler (assigns pods to nodes), and the controller manager (runs reconciliation loops, including the Deployment controller). The data plane consists of Kubernetes nodes running kubelet (the per-node agent) and a container runtime such as containerd or CRI-O. Understanding this split matters before touching <code>kubectl: commands go to the API server; pods execute on nodes.
For more on how Kubernetes fits into a microservices architecture, including how the Kubernetes API server adopts gRPC for internal communication, see the Microservices Communication guide.
Kubernetes Architecture in Plain Terms
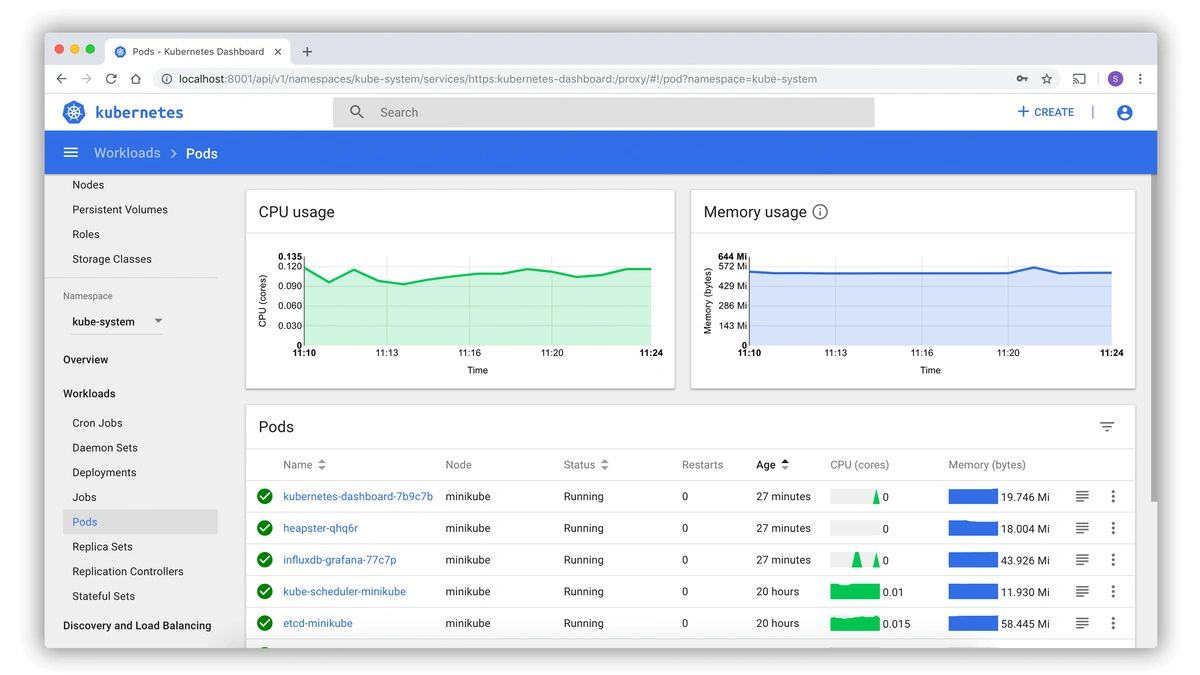
Four terms come up in every Kubernetes conversation. Knowing each one before running a command prevents misreading error messages and kubectl output.
- Control Plane
- The set of processes (API server, etcd, scheduler, controller manager) that store cluster state and issue scheduling decisions; it does not run application workloads.
- Kubernetes Node
- A worker machine (virtual or physical) that runs pods; each node runs kubelet, kube-proxy, and a container runtime.
- Pod
- The smallest deployable unit in Kubernetes; one or more containers sharing a network namespace and storage volumes, always scheduled together on the same node.
- Kubelet
- The per-node agent that watches the API server for pod assignments and ensures containers are started, healthy, and restarted on failure per the spec.
The Kubernetes Deployment documentation from CNCF contains the authoritative architecture diagram mapping these components to API objects.
Setting Up Your Local Environment
Kubernetes Deployment requires a running cluster to test, and the fastest path to a local one for most developers is minikube. Minikube runs a single-node Kubernetes cluster inside a virtual machine or directly in Docker, which means the container runtime is already present when you start it. The official system requirements are 2 CPU cores and 2 GB of free RAM; below those figures, pod scheduling will stall with Insufficient cpu events.
Docker Desktop ships its own Kubernetes toggle (Settings > Kubernetes > Enable Kubernetes). That toggle is adequate for developers who want the simplest possible setup. A minikube cluster gives more control: you can pin the Kubernetes version, switch container runtimes, and simulate multi-node topologies with minikube node add. For a beginner working through this guide, either option works.
The Docker image build step happens before any cluster interaction, so Docker Engine (or Docker Desktop) is a prerequisite regardless of which local cluster approach you choose. See the Docker Dockerfile reference for build instruction syntax. Once your image exists locally or in a registry, the cluster can pull it.
Installing Docker and kubectl
- Install Docker Desktop or Docker Engine for your platform (macOS, Linux, or Windows) from docs.docker.com.
- Install kubectl via Homebrew on macOS (
brew install kubectl), apt/yum on Linux, or winget on Windows; see kubernetes.io/docs/tasks/tools/. - Install minikube from the minikube Getting Started documentation; the package manager paths match kubectl.
- Start the minikube cluster with
minikube start --driver=docker; this pulls the Kubernetes node image and configures your kubeconfig automatically. - Verify with
kubectl get nodes; a single row showingminikube Readyconfirms the cluster is reachable.
Once the minikube cluster reports Ready, kubectl cluster-info prints the control plane URL and CoreDNS addresses. These two commands together confirm both the cluster and your client configuration are working before you write any manifest. For integrating this local workflow into a CI/CD pipeline that builds and pushes Docker images automatically, see CI/CD pipeline and programming languages.
Writing Your First YAML Manifest
Kubernetes Deployment is declared in a YAML manifest: a plain-text file that describes the desired state of the workload. The manifest below is production-aware, not a stripped-down demo. It includes resource limits and a liveness probe because omitting either in a shared cluster causes neighbor-affecting failures, not just local ones.
apiVersion: apps/v1
kind: Deployment
metadata:
  name: web-app
  labels:
    app: web-app
spec:
  replicas: 3
  selector:
    matchLabels:
      app: web-app
  template:
    metadata:
      labels:
        app: web-app
    spec:
      containers:
        - name: web-app
          image: your-registry/web-app:v1.0.0
          ports:
            - containerPort: 8080
          resources:
            requests:
              cpu: "250m"
              memory: "128Mi"
            limits:
              cpu: "500m"
              memory: "256Mi"
          livenessProbe:
            httpGet:
              path: /healthz
              port: 8080
            initialDelaySeconds: 15
            periodSeconds: 10
Each field has a specific function. apiVersion: apps/v1 identifies the API group that owns the Deployment resource. spec.replicas: 3 tells the controller to maintain three pod instances. spec.selector.matchLabels is the label selector that binds the controller to its pods; the label must match spec.template.metadata.labels exactly, because mismatches produce orphaned pods that no controller manages. The deployment configuration's spec.template block is the pod blueprint: every pod the controller creates derives from it.
When you run kubectl apply -f deployment.yaml, the controller creates a replica set, which in turn creates individual pods. The controller owns the replica set; the replica set owns the pods. This two-level ownership enables rollback: each update produces a new replica set, and the prior one stays dormant until explicitly garbage-collected. Running kubectl apply again after editing the manifest is idempotent; Kubernetes computes the diff and applies only what changed.
To see how YAML manifests fit into a broader infrastructure-as-code workflow, including tools that provision the underlying cluster nodes, see infrastructure as code tools.
Resource Limits and Liveness Probes
Resource limits protect shared Kubernetes nodes from runaway containers. The scheduler uses requests values for pod scheduling decisions (bin-packing pods onto nodes with sufficient capacity) and uses limits to cap consumption at runtime. A container without requests.cpu is invisible to the scheduler's bin-packing logic. A container without limits.memory can consume all available memory on a Kubernetes node and trigger OOM kills on unrelated neighboring pods. Both scenarios fail silently until they cause an outage. See the Kubernetes Resource Management documentation for the formal definition of requests vs limits.
A liveness probe tells kubelet whether a container is alive. Without one, kubelet considers any running process healthy, even a deadlocked web server. The initialDelaySeconds field prevents the probe from firing before the application has finished its startup sequence; setting it too low causes CrashLoopBackOff on applications with slow initialization. See the Kubernetes probe configuration documentation for HTTP, TCP, and exec probe types.
| Field | Purpose |
|---|---|
resources.requests.cpu | Minimum CPU guaranteed to the container; used by the scheduler for pod scheduling. |
resources.requests.memory | Minimum memory guaranteed; scheduler rejects placement if no node has this free. |
resources.limits.cpu | CPU cap; container is throttled (not killed) if it exceeds this value. |
resources.limits.memory | Memory cap; container is OOM-killed if it exceeds this value. |
livenessProbe.httpGet | HTTP endpoint kubelet polls to confirm the process is responding. |
livenessProbe.initialDelaySeconds | Seconds to wait after container start before the first probe fires. |
Scale, Rollout, and Rollback with kubectl
Kubernetes Deployment lifecycle operations flow through four kubectl commands. Understanding what each command does to the underlying replica set prevents confusion when reading rollout history or diagnosing failed updates.
Scaling and Update Strategies
kubectl apply -f deployment.yaml: applies the deployment configuration from the manifest; creates or updates the object; triggers a rolling update if the pod template changed. Output:deployment.apps/web-app configured.kubectl rollout status deployment/web-app: streams the rolling update progress until all pods in the new replica set are Ready; exits with code 0 on success, code 1 on timeout. Output:deployment "web-app" successfully rolled out.kubectl scale deployment/web-app --replicas=5: imperatively adjusts the replica count without touching the manifest; useful for traffic spikes. Output:deployment.apps/web-app scaled.kubectl rollout undo deployment/web-app: reverts to the previous replica set; Kubernetes keeps the prior ReplicaSet dormant for exactly this purpose; therevisionHistoryLimitfield (default: 10) controls how many prior ReplicaSets are retained.
A rolling update by default keeps at least 75% of desired pods available (maxUnavailable: 25%) and allows at most 125% of desired pods to exist simultaneously (maxSurge: 25%). Override both in spec.strategy.rollingUpdate when a tighter availability guarantee or a faster cutover is required. For infrastructure provisioning context, including the Terraform workflows that create the underlying node pools on EKS or GKE, see Terraform vs Ansible vs CloudFormation.
| Strategy | Downtime | Use Case |
|---|---|---|
| RollingUpdate (default) | None (with correct maxUnavailable/maxSurge) | Stateless services with multiple replicas; standard production deployments. |
| Recreate | Full gap between old and new pods | Single-replica stateful applications where two versions cannot run simultaneously. |
Manual kubectl apply is a development workflow. Production pipelines push through GitHub Actions or GitLab CI, where the same command runs as a pipeline step after image build and test. The rollout and rollback commands are identical in both contexts; only the trigger changes. See also: full stack development.
Troubleshooting Common Kubernetes Issues
Kubernetes Deployment surfaces failures through pod status strings and event logs. Six failure states account for the majority of beginner problems; each has a specific diagnostic command and a narrow set of root causes.
- ImagePullBackOff
- Diagnostic:
kubectl describe pod <pod-name>: look for "Failed to pull image" in Events.
Root cause: Wrong image tag, or private registry credentials not mounted as an imagePullSecret.
Fix: Correct the tag in the deployment configuration, or create a Secret with registry credentials and reference it inspec.imagePullSecrets. - CrashLoopBackOff
- Diagnostic:
kubectl logs <pod-name> --previousshows the last exit output before the crash.
Root cause: Application exits on startup (misconfigured environment variable, missing dependency) or a liveness probe fires before the app is ready becauseinitialDelaySecondsis too short.
Fix: Fix the application error or increaselivenessProbe.initialDelaySeconds. See the Kubernetes probe configuration documentation for probe timing guidance. - Pending pods
- Diagnostic:
kubectl describe pod <pod-name>: Events section shows "Insufficient cpu" or "Insufficient memory" when pod scheduling is blocked.
Root cause: No Kubernetes node has enough unallocated CPU or memory to satisfy the pod's resource limits requests; or a node taint rejects the pod.
Fix: Reduce resource limits requests, add a Kubernetes node to the cluster, or add a matching toleration for the taint. - OOMKilled
- Diagnostic:
kubectl describe pod <pod-name>showsOOMKilledas the last state reason.
Root cause: Container consumed more memory than its resource limits ceiling; the kernel OOM killer terminated the process.
Fix: Raiselimits.memoryor fix the memory leak in the application code. - Service not reachable
- Diagnostic:
kubectl get endpoints <service-name>: an empty Endpoints object (no pod IPs listed) confirms a label selector mismatch.
Root cause: The Service'sspec.selectorlabels do not match the pod labels set by the deployment configuration's pod template.
Fix: Align the label keys and values in both the Service selector and the pod template. - ErrImageNeverPull
- Diagnostic:
kubectl describe pod <pod-name>shows "ErrImageNeverPull" in Events.
Root cause:imagePullPolicy: Neveris set, but the Docker image is not cached on the target Kubernetes node, which is common when switching from a minikube cluster to a remote cluster.
Fix: Push the Docker image to a registry and changeimagePullPolicytoAlwaysorIfNotPresent.
Docker vs Kubernetes: Choosing the Right Tool
Kubernetes Deployment adds meaningful operational capability over Docker alone, and with it comes meaningful operational overhead. For teams evaluating container orchestration for the first time, the decision comes down to five concrete requirements.
| Capability | Docker alone (or Compose) | With Kubernetes |
|---|---|---|
| Replica management | Manual restart; single-host only | Automatic ReplicaSet maintenance across nodes |
| Rolling updates | No native support; requires custom scripts | Declarative strategy with configurable maxUnavailable and maxSurge |
| Self-healing | None; crashed containers stay down until manually restarted | Liveness probe failures trigger automatic container restarts |
| Operational overhead | Low; single host, no control plane | Medium to high; cluster management, etcd backups, RBAC, networking |
| Scale ceiling | One host (vertical scaling only) | Horizontal scaling across multiple Kubernetes nodes |
The practical decision rule: use Docker Compose for single-host development, local testing, and CI runners where the containerized application never needs more than one instance. Graduate to Kubernetes when any of the following becomes true: the service needs more than one replica for availability, rolling updates with zero downtime are a requirement, or the workload must run across more than one physical or virtual host.
A minikube cluster covers the entire learning curve from manifest authoring through rollback without touching cloud infrastructure. Once local workflows are stable, the natural next step is a managed cluster. For a comparison of AWS deployment options including EKS (Elastic Kubernetes Service), see AWS deployment options including EKS.
Further reading
- Kubernetes Deployment documentation (CNCF): full spec reference for all Deployment fields, update strategies, and rollout history management.
- Kubernetes Resource Management documentation (CNCF): authoritative explanation of CPU and memory requests vs limits and scheduler bin-packing behavior.
- Kubernetes probe configuration documentation (CNCF): HTTP, TCP, and exec probe types with timing parameters and startup probe usage for slow-starting applications.
- minikube Getting Started documentation (CNCF subproject): system requirements, driver options, and multi-node simulation for local Kubernetes development.
- Microservices Communication guide: how Kubernetes-hosted services communicate via gRPC, REST, and message queues once deployment is stable.
- Best Programming Languages for AI Development: Python, C++, and Rust Compared
- Choosing Go vs Rust vs Python For Backend Services